The Challenging Hurdle
Carrying your camera around with you is enough of a pain; ever tried climbing with it? Sure, you can toss the camera around your neck or over your shoulder, but this quickly presents problems. Within the first ten feet of climbing you will discover your camera just bounces off the structure. To avoid this you need to constantly baby your equipment as you climb. That’s inefficient, distracting, and dangerous. Wearing a harness gives you the perfect opportunity to attach small gear bags.
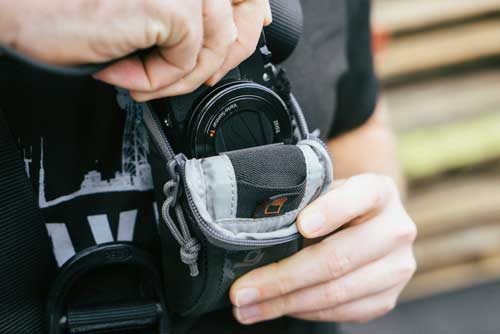
I have a few different products I use to store my cameras as I climb. The best tip here is to find one that is just large enough to carry the camera you use. This will prevent excess bulk and keep things lightweight (I hate having large stuff attached to me as I climb; there is enough gear hanging off me as it is). There are a few different products I use, for different situations and gear. For obvious reasons I will also attach a back-up strap of some kind to each of these bags. Additionally, I use small sections of cordage, which can be reused and repurposed in the field.
Tip #1.
The Petzl Grillon, a Work positioning lanyard (WPL), is by far one of my favorite pieces of equipment. I won’t be caught on an “at height” shoot without one. I use a WPL just like any user would – to free up both hands. I usually have a pretty clear idea where my subject is going to be before my feet ever leave the ground. This helps me know where I need to be to get the shot. Once I am there I take a moment to position off so I can free up my hands to work more effectively. Trying to hold a camera, focus, and change exposure while having one hand on the structure is far too difficult, tiring, and dangerous. Additionally, WPLs have a pretty reasonable range on them. I can tighten and loosen them, giving me a few feet of range in pretty much any direction, so I never feel constrained. I can even use it to add stability to my shot when leaning out from the structure to get a different angle. If you take the time to set it up properly, you will not regret it!
Tip #2.
As I said before, I always preplan a shoot as best I can beforehand. I have a pretty good idea where my subject is going to be, what is going to be the coolest looking background, and so on. That being said, I am always looking for a fresh new perspective while shooting. I never want to anchor myself to one direction to shoot something. If I do this I will enviably miss something that would have been much more interesting. Don’t be afraid to move around and try various angles. A quick Google search for “The Rule of Thirds” will provide a host of information (if you really want to nerd out on this). For the sake of keeping this quick, I would tell you not to center your subject in the middle of the frame. Move the camera so your subject is balanced on the left or right of the frame. Fill the opposite side of the frame with an interesting background or even the structure you are climbing. One of my main goals is to give the viewer a sense of place. Do not simply hold the camera up. Take a quick photo and move on. I always take an extra few minutes to make sure there isn’t a better shot I can take. Most of the time there is.
You don’t have your camera?
Often a shot on a mobile phone can more than suffice for Facebook or Instagram. I love the VSCO app – I use it to edit 99% of my images I take with my phone. I will even use WiFi options (now common on most cameras) to load a quick selection to my phone, make a quick edit and post them. There are a number of additional filters you can download for cheap. Overall, it is a powerful app. Personally, I like the A6 filter, and I always keep my edits very minimal. A common mistake is to go overboard on editing, which takes away from the original intent of the photo. KEEP IT SIMPLE!